
Oracle APEX beginners can find their first project on their own to be a daunting task.
In my previous post, “Five Things to Love About Oracle APEX,” I ended with the cliffhanger that I would show you how to create a basic full-stack application quickly in APEX. Today, we are going to do that, and all before you finish your first cup of coffee.
[su_spacer size=”15″]Build the Tables with Quick SQL
Navigate within APEX to SQL Workshop > Utilities > Quick SQL and drop in this code:
test_person
  first_name varchar2(100)
  last_name varchar2(100)

test_thing
  name varchar2(100)
  color varchar2(100)

test_person_thing
  test_person_id number /references test_person
  test_thing_id number  /references test_thing
This code creates the three tables that will be the foundation of our application.
APEX interprets Quick SQL and fills in a number of gaps here. Each table gets a serial primary key, and each entered column gets assigned a data type (varchar2, date, number, et cetera) Additionally, we have created a join table with two foreign keys that it will pick up on.
When we RUN this code snippet that we’ve written, APEX creates these three tables in our database, and then we can choose to CREATE APP. After that, APEX shows off by building our initial application based upon this table schema and predicting what pages and forms we’ll need.
[su_spacer size=”15″]Explore and Customize the App
I named my application BLOGTEST. After we login to the app, we can see that APEX has built us a number of things right away. We have a homepage with three navigation cards, one each to a report representing our tables; Person, Thing, and Person Thing.
[su_spacer size=”10″]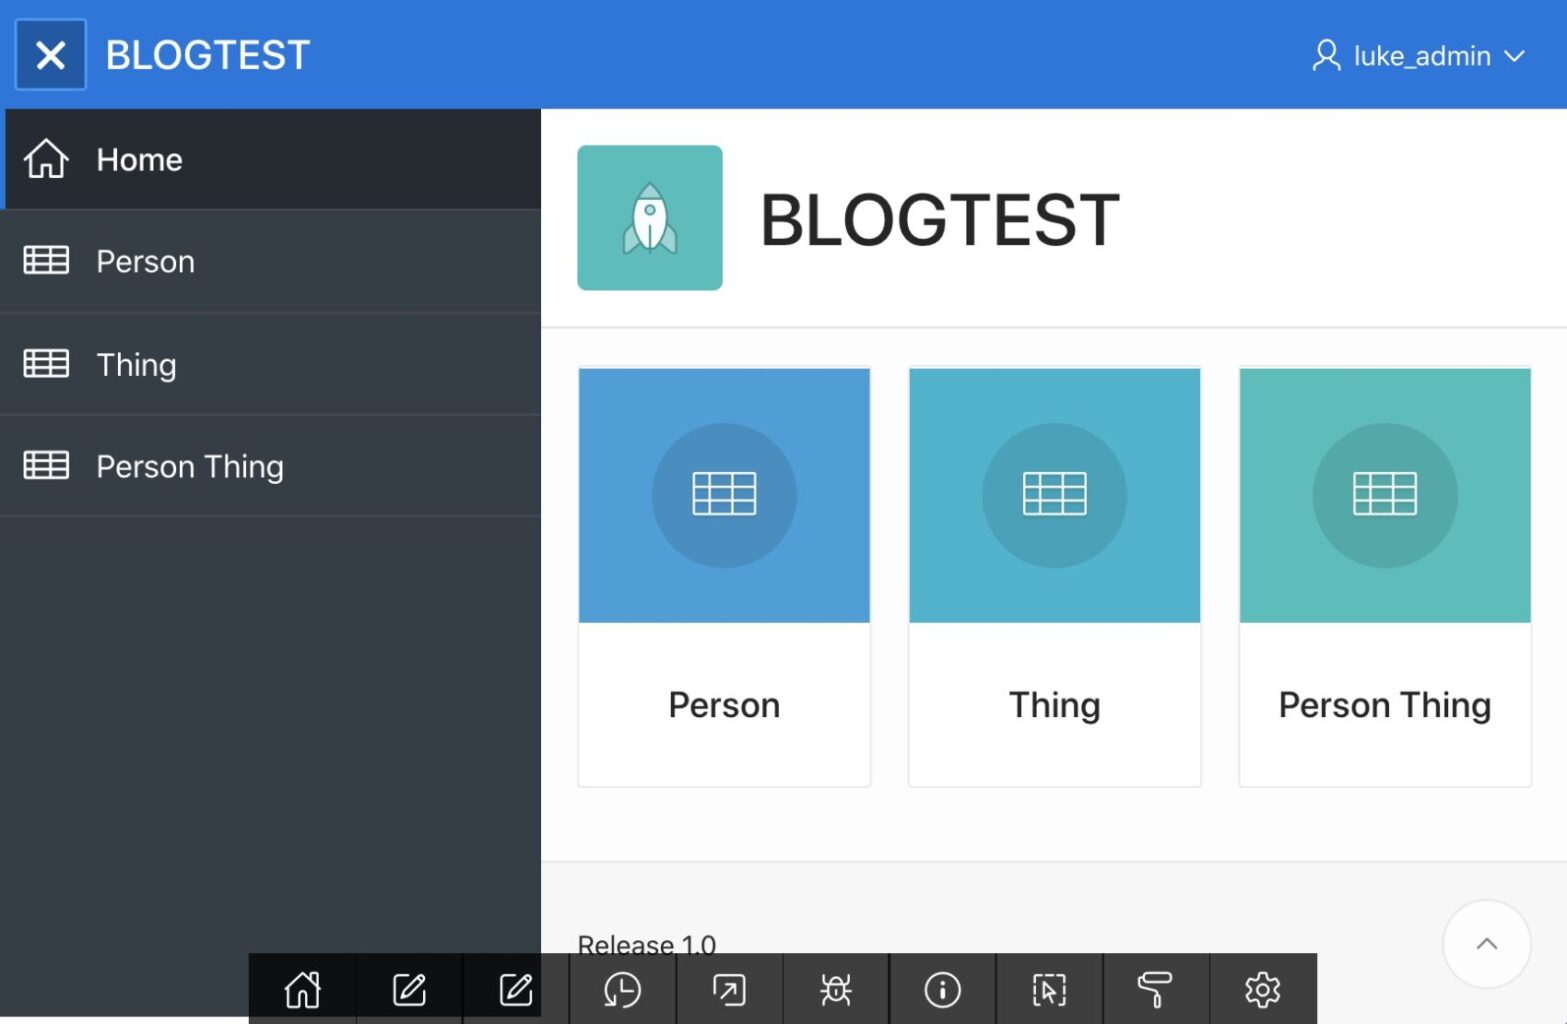
We also have a collapsible navigation menu in the top left, and a user/account in the top right. Using the navigation, we can check each page.
[su_spacer size=”10″]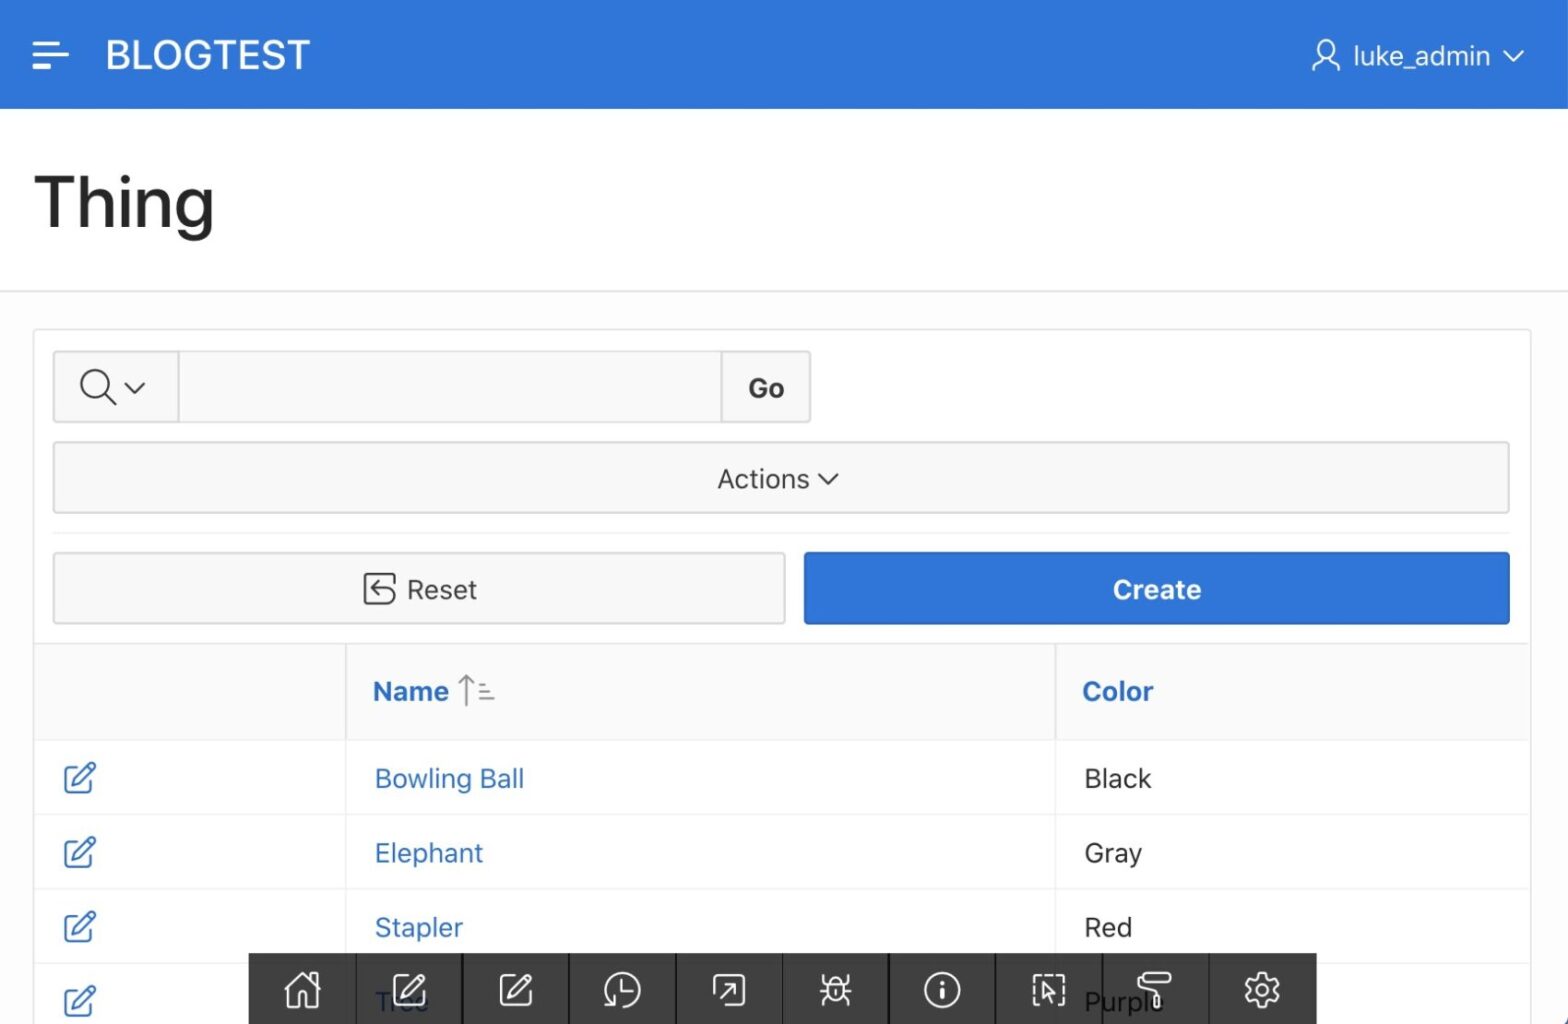
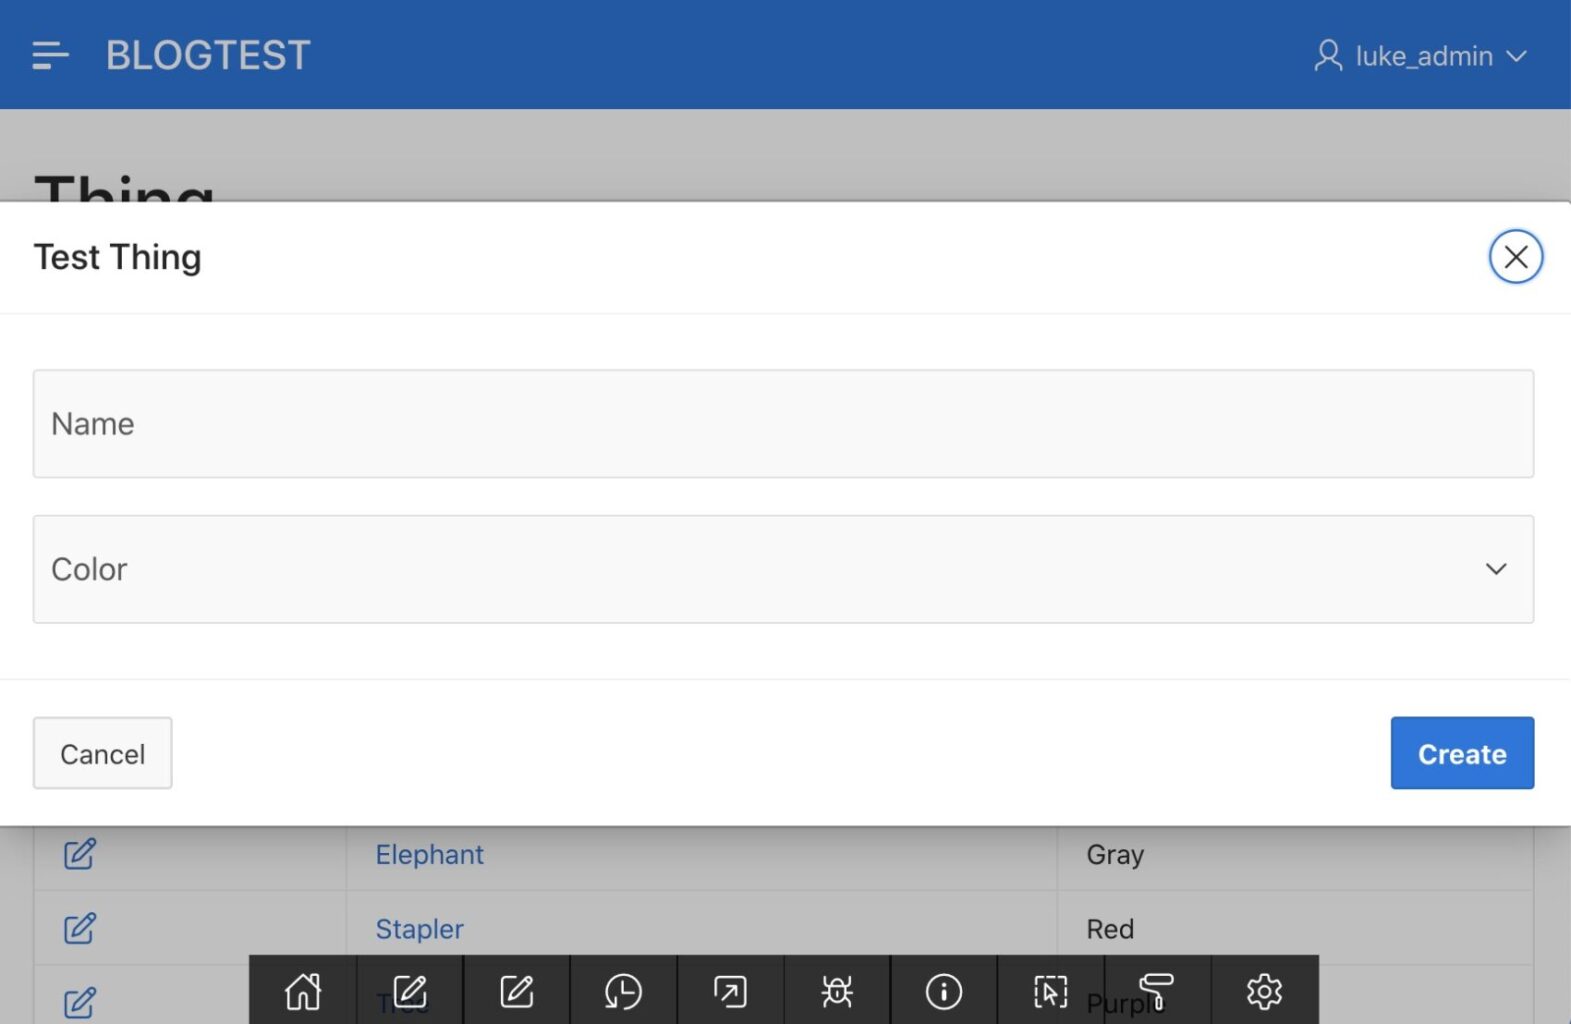
If we use a select list, popup LOV, or radio button widget, we can create a List Of Values within the widget to give the user a selection of color choices on the Thing Form.
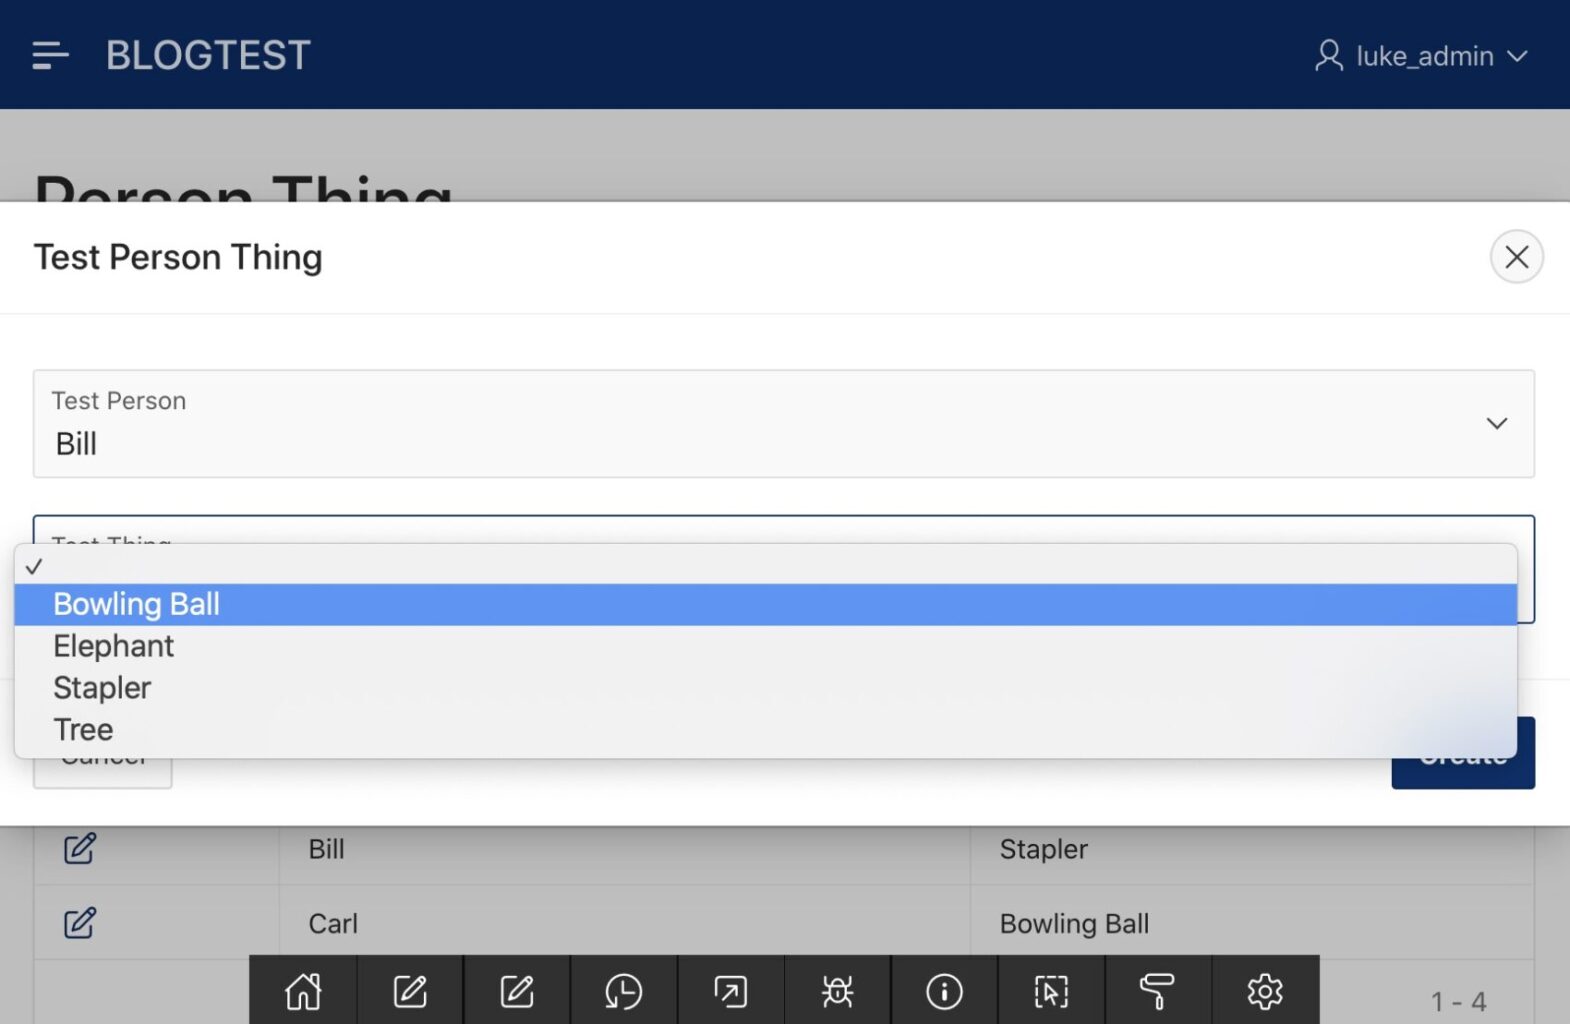
We can do the same for the Person Thing Form, loading drop-down selectors with the names of items from both the Person table and the Thing table.
[su_spacer size=”10″]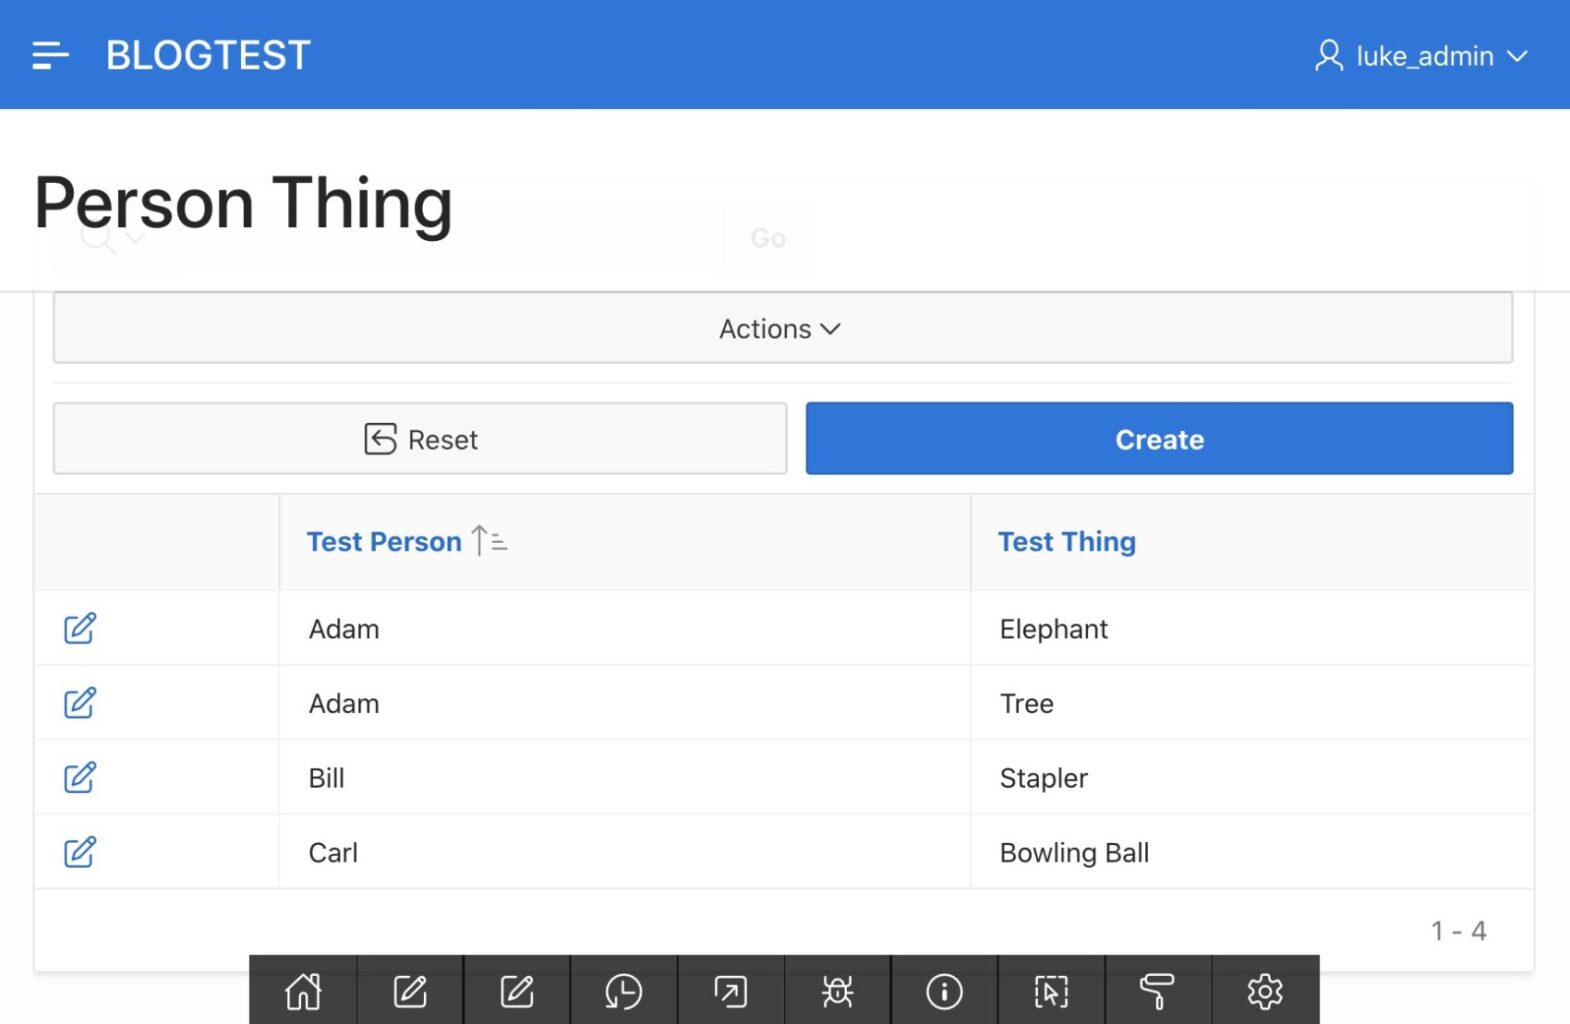
Let’s customize the color palette to add my favorite shade of blue. Using the client-side Theme Roller, not only can we add custom colors, but APEX gives me quality information about how web accessible the choices are.
[su_spacer size=”10″]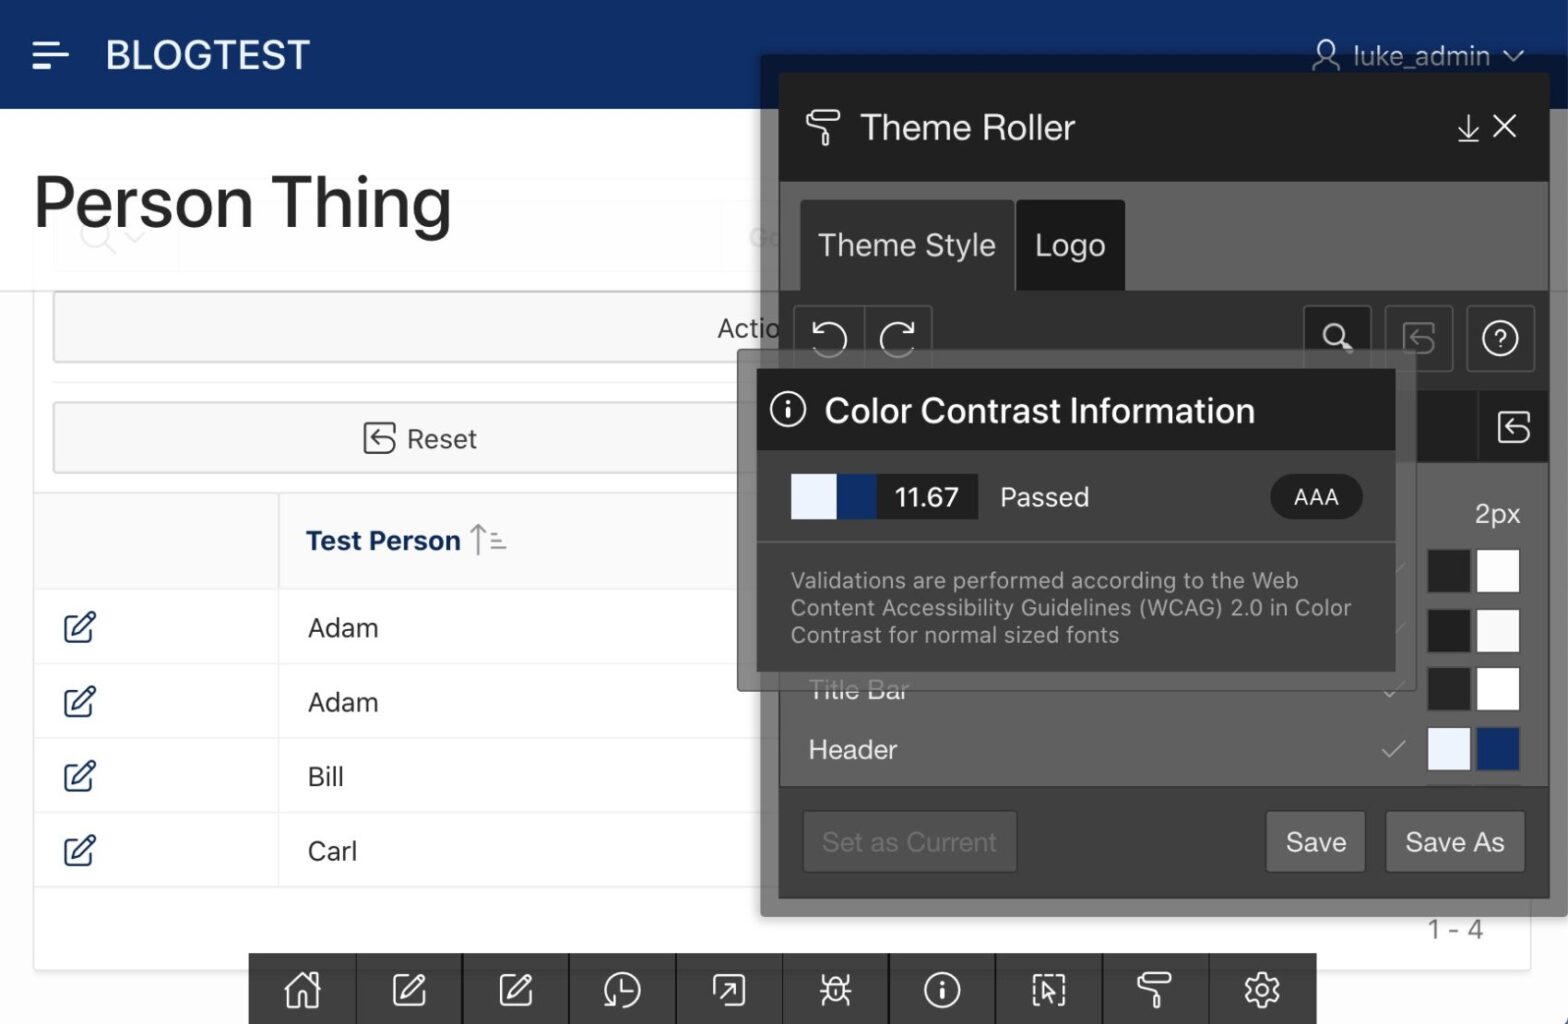
So, there you have it. Within minutes of logging in, we have a fully functional application. It is ready to use and personalized with minimal effort. The great news is that the time APEX has saved us can now be spent on other things, like further customization of the application for a client.
Now go get that second cup of coffee.
[su_spacer size=”30″]Learn More About Luke
[su_spacer size=”30″]Interested in Working With Traust?