Automated emails can save a lot of effort when developing an APEX application. But if you hard-code those messages, you may produce multiple automations that can run under the same circumstances. Instead, let’s use the application we built in the previous post to produce unique welcome messages to new Employees depending on which Department they work in.
Before you begin: To successfully implement the following tutorial, you’ll first need to setup an Oracle APEX email server. The following articles from Oracle will show you how to do so:
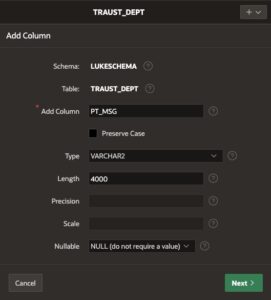
Okay, now that you’ve got your email server set up, we can begin. First, we’ll need to add a new column to each of our tables. In the top menu of APEX, navigate to SQL Workshop > Object Browser. Select the TRAUST_DEPT table on the left, then along the top, click Add Column button. Add a new column called PT_MSG, and set the type to VARCHAR2 with a length of 4000 characters. This column will contain the body of the message we want to send to a Department’s Employee.
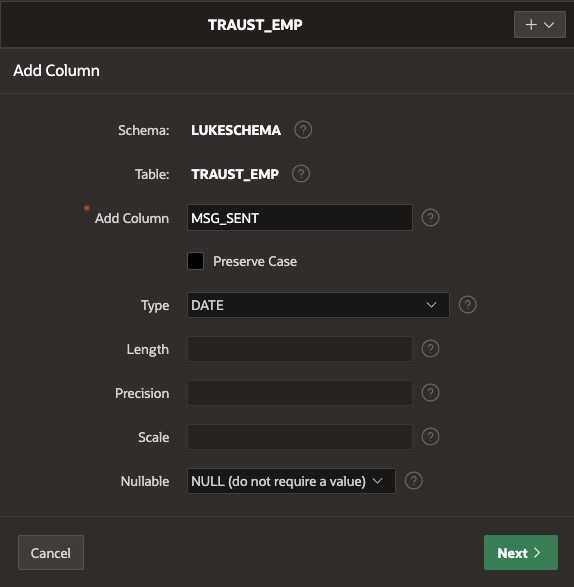
Similarly, let’s navigate to our Employee table, TRAUST_EMP, and add a new column called MSG_SENT, this time setting the data type to DATE. This will allow us to show that the message was sent, and on what date.
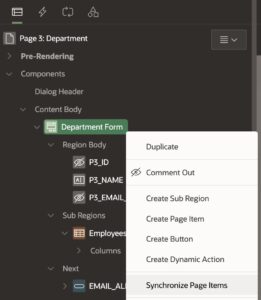
 Next we need a way to set each Department’s message, and we can allow the User to do that from the client-side form. Navigate to the page that contains the Department form. In the left pane, right-click on the form region, and select Synchronize Page Items. This will add a text field to your form.
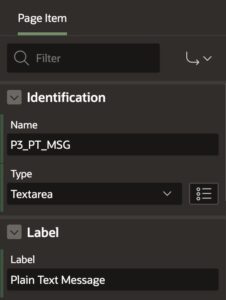
Now, rename the new page item to Plain Text message.
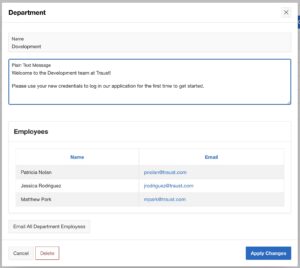
When we open the Department form, we can see our User has a way to add and edit a message that will be sent to Department Employees. Feel free to add a message to each of the Departments in your database.
From the development interface, navigate to Shared Components > Workflows and Automations > Automations. This is where a developer can run scheduled jobs to either Execute PL/SQL code, send automated emails, or both.
Within Automations, click the Create button. Name the automation ‘Send Welcome Message’, and leave the other settings at their default values. Then click Next. On the following page, set the change the source type to SQL Query, and paste in the following code:
traust_emp.id,
traust_emp.name as employee,
traust_emp.email,
traust_dept.name as department,
traust_dept.pt_msg
from
traust_emp,
traust_dept
where traust_emp.traust_dept_id = traust_dept.id
and traust_emp.msg_sent is null
Leave the ‘Execute Actions When’ set to ‘Rows Returned’ and click the Create button.
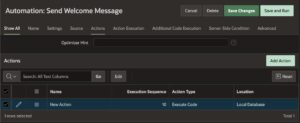
This query tells the automation to run when an employee is found, as well as returning all the information we’ll need to construct our automated email. Within the new automation, scroll to the Actions subsection. By default, a new automation comes with a single Execute Code action, but without any executable code.
 Open the New Action by clicking its edit pencil, rename it Send Email, then update the Type to ‘Send E-Mail’. Each of the form items in this automation type allows us to use substitution strings to customize the message. Use values from the SQL Select Query above to fill out the form and produce a custom dynamic email, then click the Apply Changes button in the top-right of the page.
Now, let’s create a second Action to update the Employee, adding a date to the msg_sent column. This will prevent the automation from sending the message to the same Employee more than once. Back in the automation’s Actions subsection, click the button to Add Action.
Update the name of this action to ‘Update User’, but leave the Type as ‘Execute Code’ and the Execution Sequence as 20. This will ensure that our Execute Code action runs after our Send Email action.
In the Code subsection we’ll run a simple update statement using a bind variable in the WHERE clause to update the correct row. These bind variables can refer to any of the data points returned by the SQL Select statement of the automation. Paste the following statement into the code editor, then click the Create button in the top-right.
set msg_sent = sysdate
where id = :ID;
Back in the Send Welcome Message automation, you can now click Save and Run to test its operation. Congratulations!
Here are four things to keep in mind as you build out your automated messages:
- If you have not identified an APP_EMAIL, set the ‘Send Email’ action’s ‘From’ address to an address you own.
- Your automation will send the emails to the addresses in the Employee table in your database. If you want to see the messages, you’ll have to update one or more of the email addresses to one that you own.
- To turn on the automation, you have to update the automation’s Schedule Status from ‘Disabled’ to ‘Active’.
- Per Oracle documentation, you will need to use the DBMS_NETWORK_ACL_ADMIN package to grant connect privileges to any host for the apex_180100 database user.
In part 3 of our series, we’ll dig into sending automated emails with advanced HTML formatting.
Stuck on a challenging APEX project? Traust provides expert Oracle APEX application development — and training for your team! Contact us today for more information.