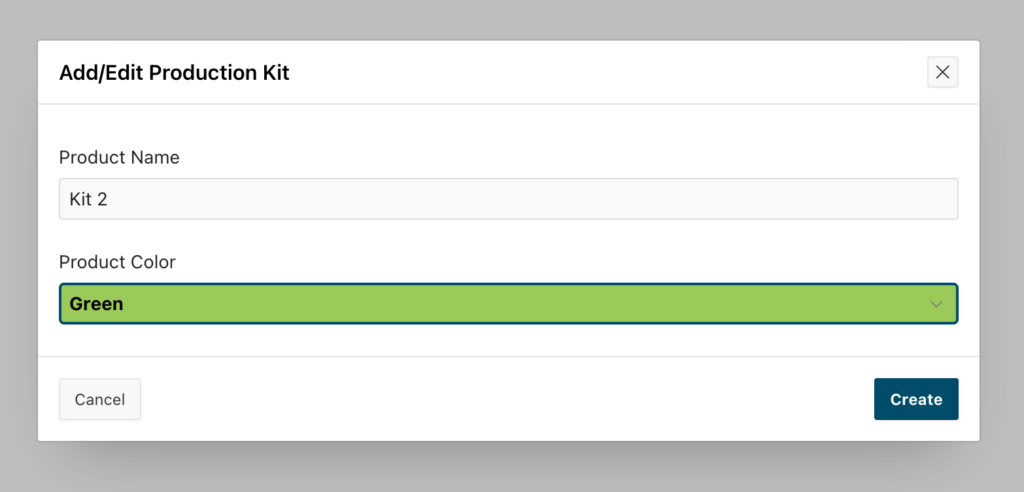
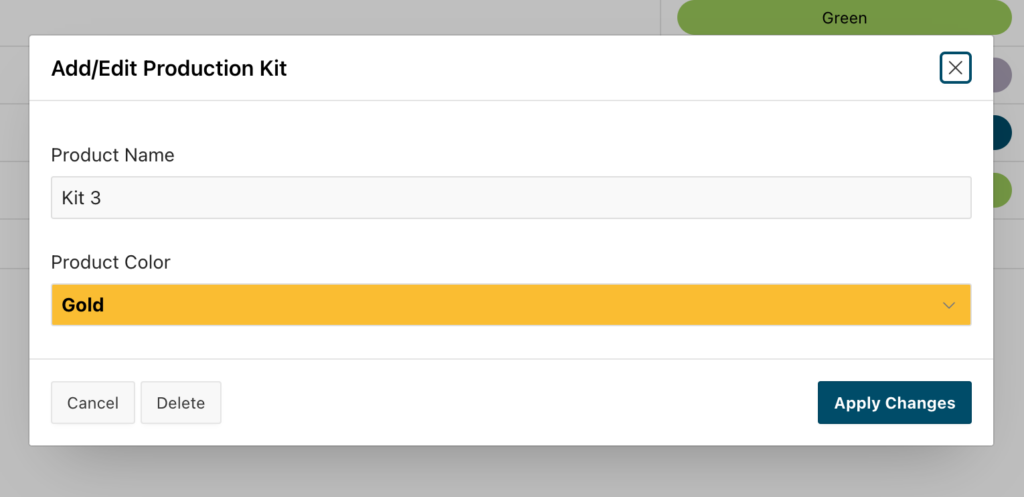
In a previous Oracle APEX tutorial, my colleague Andrew Schultz wrote about how to conditionally change the background color of a select list based on the chosen option. This works great when you have a fixed set of options that will never change, but the solution is limited, because it requires a developer to make edits to the code if you need to add or change colors. In this tutorial, we’ll show you how to expand this functionality, allowing authorized users to define a list of colors that can then be used to dynamically change the color of a select list in Oracle APEX.
Manufacturing Production Kits
For this tutorial, imagine a manufacturer who assembles bulk parts into a variety of different packages for resale. Each of these production kits has a distinct Bill of Materials (BOM) and is classified using a separate color. Workers on the assembly floor receive production orders for these production kits based on color and can then reference the BOM for that color in order to assemble each of the different kits. Our APEX app will allow users to define the available colors for each production kit and then select from a list of those colors for each kit.
For our demo app, we’ll need the following:
- Table to define our colors
- Table to define our production kits
- Form to add and edit colors
- Page with a report of the colors in our table
- List of values (LOV) based on the table
- Form for creating production kits that includes a select list for our colors
- A Dynamic Action with four (4) TRUE Actions
Creating the Tables
Let’s get started by creating our COLORS table with the following columns:
| Column Name | Data Type | |
| COLOR_ID | number | |
| COLOR | varchar2(100 char) | This is the name of our color. |
| COLOR_HEX | varchar2(100 char) | This is the hexadecimal value of the color. |
| TYPE_HEX | varchar2(100 char) | This is the hexadecimal value of the text. We’ll allow white text for dark colors and black text for light colors. |
We’ll also need a table for the PRODUCTION_KITS:
| Column Name | Data Type | |
| PRODUCT_ID | number | |
| PRODUCT_NAME | varchar2(100 char) | |
| PRODUCT_COLOR | number | This will be a foreign key to COLORS.COLOR_ID |
Letting Users Define Colors
Now that we have our tables, we need a way for users to view and populate the COLORS table. Create a new standard page with an Interactive Report based on the values from the COLORS table.
In our demo app, we’ve create Page 1, named Definitions, which includes an Interactive Report that displays the data from our COLORS table, including COLOR (the name of our color), COLOR_HEX, and TYPE_HEX. (The COLOR_ID column will be hidden.)
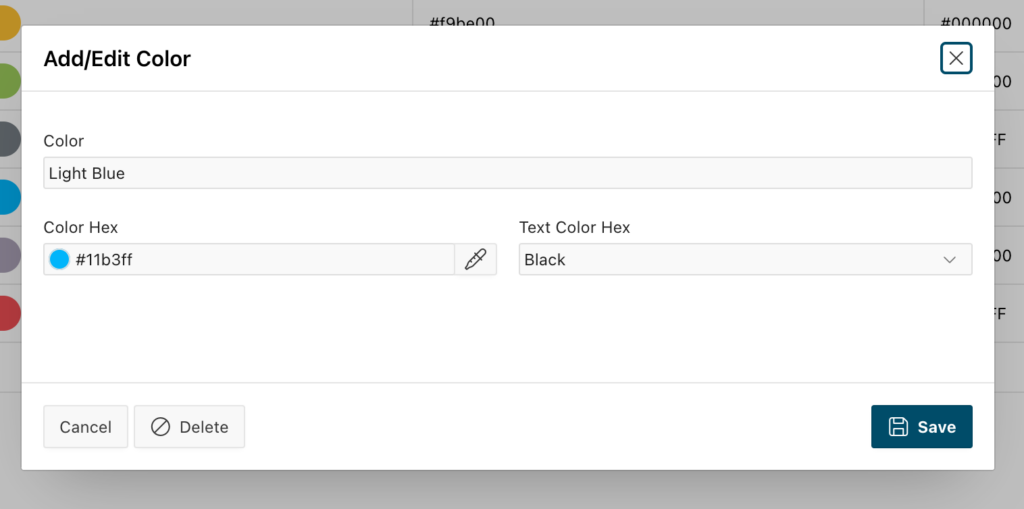
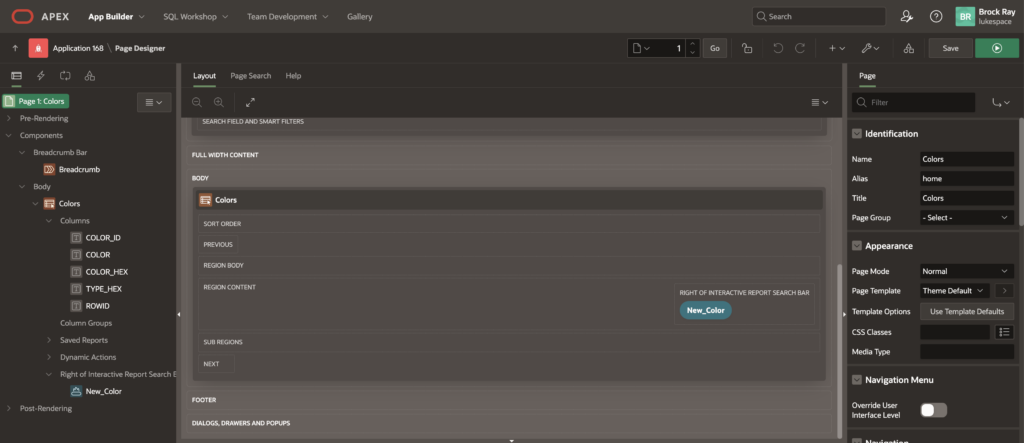 We’ll then create a new modal page with a form for adding new colors to the table. The form will have four fields:
- PX_COLOR_ID (Hidden, Primary Key)
- PX_COLOR (Text Field)
- PX_COLOR_HEX (Color Picker)
- PX_TYPE_HEX (Select List)
We want the select list for Type HEX (the text color) to only have two options: White or Black. Users will select white when adding a dark color to the table and black when adding a light color. This way, the color name will always be readable in the select list.
To make this happen, the values for PX_TYPE_HEX select list should be:
- Display Value: White, Return Value: #FFFFFF
- Display Value: Black, Return Value: #000000
Now, users can create new colors, each with a name, HEX value, and contrasting text color.
 Go back to the Page Designer for Interactive Report with our COLORS table. Expand the Columns and click on the COLOR column. On the right-hand side of the screen, scroll to the Column Formatting section and enter the following in the HTML Expression area:
<div style="background-color:#COLOR_HEX #; color:#TYPE_HEX#; padding:5px 15px; border-radius:30px; text-align:center; max-width:250px;">#COLOR#</div>
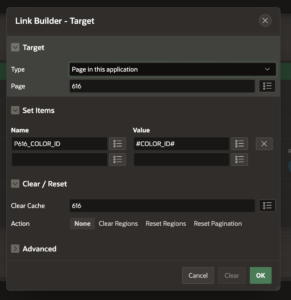
Add a button to the Interactive Report that will branch to our modal page. We’ll also set the Attributes > Link Column in our Interactive Report to point to our modal form page so users can edit an existing color. To do this, we set the target page to our modal page and pass in the ID from the COLORS table:
- Name: PX_COLOR_ID
- Value: #COLOR_ID#
List of Values
Now that our users can create colors, next, we’ll need to create a simple List of Values (LOV) based on the rows in our COLORS table. This LOV will then be used as the source of the select list on the form for creating our manufacturing Production Kits.
- In your demo app, go to Shared Components > Lists of Values and click Create.
- In the Wizard, select From Scratch.
- Name your List and select Dynamic as the Type.
- Select COLORS as the Source table.
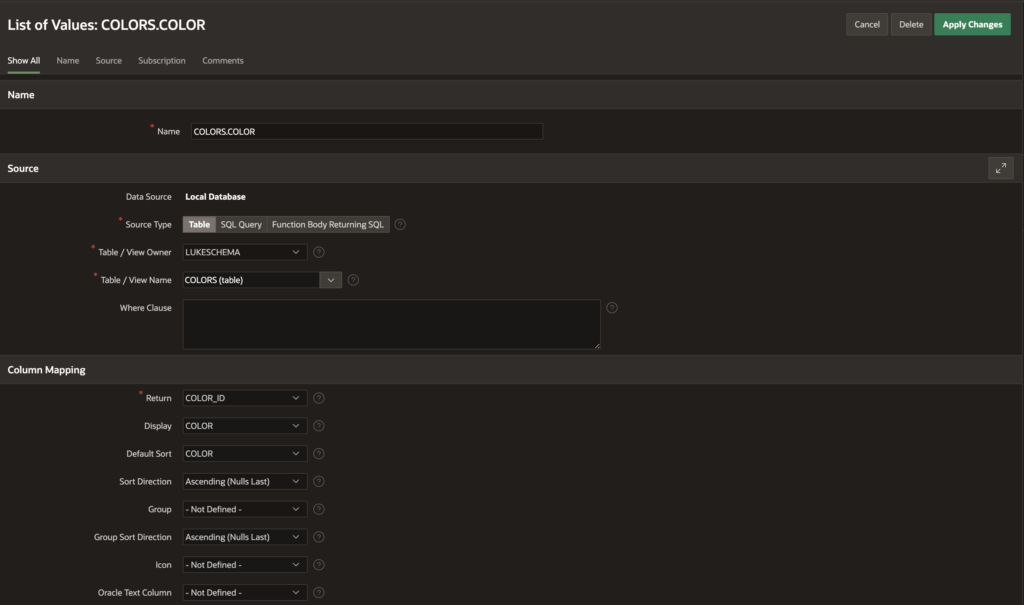
- Select COLOR_ID as your Return column and COLOR as your Display column.
- Click Create.
The result should look like this:
Defining Production Kits
Now that we have our colors defined, we’re ready to create our select list. As with the Colors, we’ll create two pages: one with an Interactive Report and the other with a modal form for adding and editing the Kits.
Use the following SQL query to define the Interactive Report on your Production Kits page:
PRODUCT_NAME,
PRODUCT_COLOR,
COLOR_HEX,
TYPE_HEX
from PRODUCTION_KITS, COLORS
where PRODUCT_COLOR = COLOR_ID
Then, as with the Interactive Report for COLORS, we’ll set the Column Formatting for the PRODUCT_COLOR column to:
<div style="background-color:#COLOR_HEX#; color:#TYPE_HEX#; padding:5px 15px; border-radius:30px; text-align:center; max-width:250px;">#PRODUCT_COLOR#</div>
Then we’ll hide the COLOR_HEX and TYPE_HEX columns. The results should look like this:
Now for the dynamic select list! On the modal form for creating Production Kits, we’ll have fields for the two columns on the PRODUCTION_KIT table:
- PX_PRODUCT_NAME — a text field
- PX_PRODUCT_COLOR — a select list
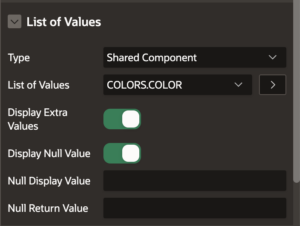
The List of Values for the select list should be set to the LOV we defined earlier:
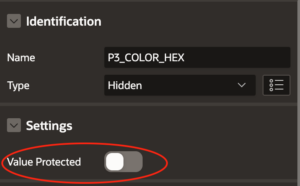
We also need to define two hidden fields: one for COLOR_HEX and one for TYPE_HEX. Be sure that Value Protected is set to Off for both fields! We’ll be updating them using a Dynamic Action.
Setting Our Dynamic Actions
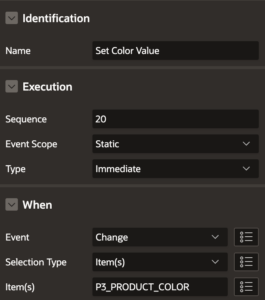
From the Dynamic Actions tab of Page Designer, right-click the Change event and select Create Dynamic Action. Name it Set Color Value and have it fire when PX_PRODUCT_COLOR select list changes.
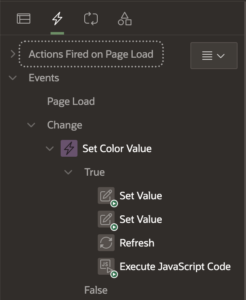 |  |
Now we’re going to set four (4) TRUE Actions. We’re going to set the value of our two hidden fields, refresh the region, and then execute some JavaScript code.
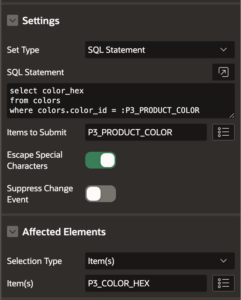
For the two Set Value actions, set the value of PX_COLOR_HEX and PX_TYPE_HEX, respectively, based on the corresponding values from the COLORS table when PX_PRODUCT_COLOR changes. Be sure to set the correct item(s) in the Affected Elements region.
 | 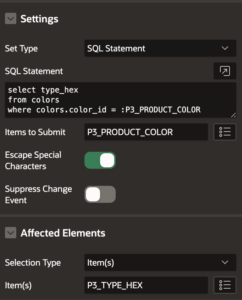 |
Set a TRUE Action to Refresh the region with your PX_PRODUCT_COLOR field. Finally, set an action to Execute JavaScript Code using the following code:
$(“#P3_PRODUCT_COLOR”).css(“background-color”, $v(“P3_COLOR_HEX”));
$(“#P3_PRODUCT_COLOR”).css(“color”, $v(“P3_TYPE_HEX”));
$(“#P3_PRODUCT_COLOR”).css(“font-weight”, “700”);
} else {
$(“#P3_PRODUCT_COLOR”).css(“background-color”, “transparent”);
$(“#P3_PRODUCT_COLOR”).css(“color”, “#333333”);
$(“#P3_PRODUCT_COLOR”).css(“font-weight”, “300”);
}
Test the Results
Save your work and run your program. Now, when you add or edit one of the Production Kits, the background of your Product Color select list will change based on the user-defined values!
Requirements
- Oracle APEX 18x+
Disclaimer:
We do not take responsibility for any unintended or unwanted consequences in your instance of Oracle, Oracle APEX, or related products as a result of reading our blogs or following our guides. Though the information is fully tested and generally safe to use, our lawyers really have a thing against admitting potential wrongdoing.


